Copyright © ir-tech All Rights Reserved.
Harnold - Political Campaign WordPress Theme
Created: 28 August 2020
Latest Update: 11 December 2020
Harnold Master Version: 1.0.2
Harnold Version: 1.0.1
By: ir-tech
Email: [email protected]
Thank you for purchasing our Harnold - Political Campaign WordPress Theme.
If you have any question, please feel free to contact us.
Install WordPress
To get this theme you must have WordPress already installed. If you need help installing WordPress, follow the instructions in WordPress Codex. Below are some useful links on WordPress information:
WordPress Codex – general information about WordPress and how to install it on your server.
First Steps With WordPress – general information included a wide variety of topics.
FAQ New To WordPress – most Frequently Asked Questions regarding WordPress..
Install Theme
when you purchase Harnold WordPress theme form Themeforest, you will be able to download Harnold Files form your download options. Unzip your downloaded file inside this zip your will find main-file and in main-file you will see 3 Folder and 2 zip Files. like below screenshort.

Install Theme Via WordPress
Step 01:
Login to your WordPress dashboard – then got to Appearance > Themes > Add New > Upload Theme and Click Choose FIle Button
Step 02:
Select Harnold.zip you downloaded form themeforest and click Install Now Button
Step 03:
Wait the theme being uploaded and installed. It may take some time.

Step 04:
Wait the theme being uploaded and installed.
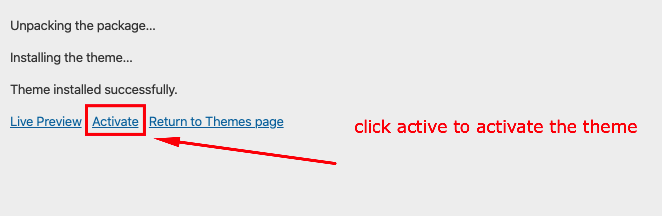
Step 05:
To activate the theme click Activate. like above
Install Theme Via FTP
Follow the steps below to install theme via FTP.
Step 01:
Log into your hosting space via an FTP software
Step 02:
Unzip the Harnold.zip file and ONLY use the extracted Harnold theme folder
Step 03:
Upload the extracted Harnold theme folder into wp-content > themes folder
Step 04:
To activate the theme: Go to Appearance > Themes hover over the theme and and click Activate.
Common Install Error: Are You Sure You Want To Do This?
The “Are You Sure You Want To Do This” message may occur, means that you are limited in upload file size. Consider install the theme via FTP if this happens, or contact your hosting provider and ask them to increase the limited size.
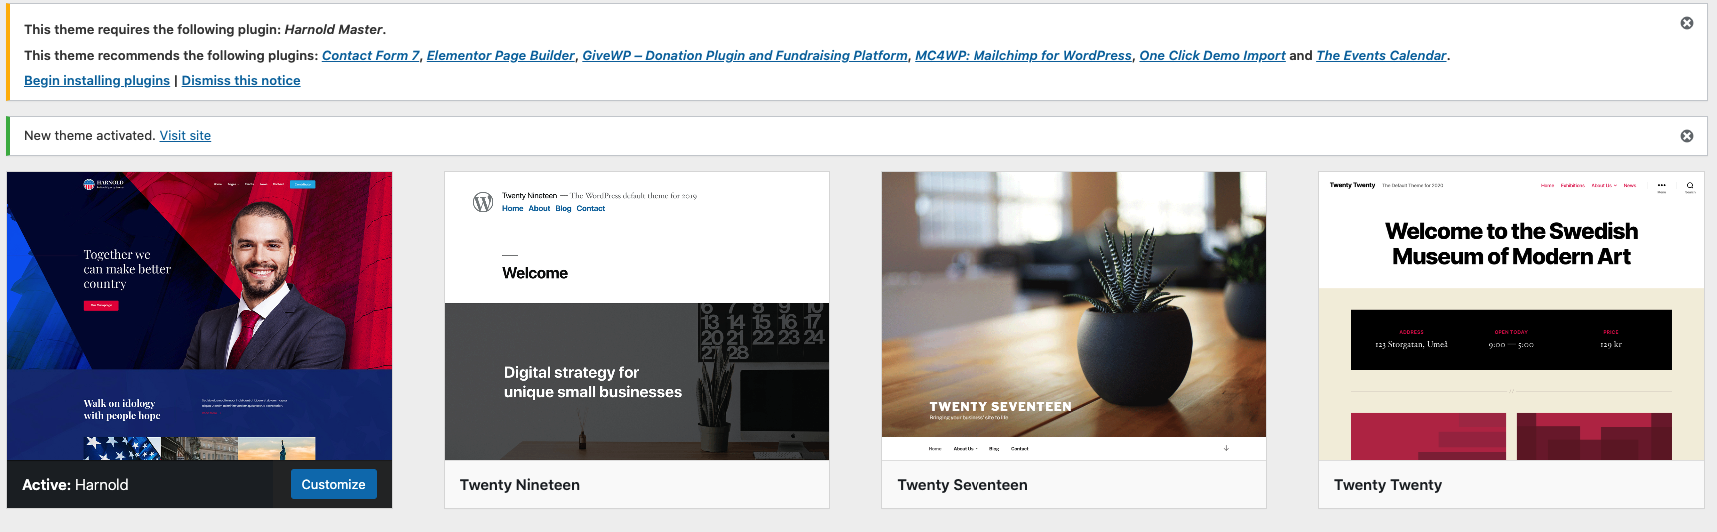
Install Required Plugins
Once you activated Harnold theme than You will get a notice for installing required plugins.
Step 01:
Click on Begin installing plugins to install required plugins.
Step 02:
Select all required plugin, From the top dropdown menu select Install and click Apply.
Step 03:
After Install all plugins sucessfully click Return to Required Plugins Installer.
Step 04:
Select all required plugin, From the top dropdown menu select Activete and click Apply.
Import Demo Data
To Import Demo Data – Now users can quickly and easily import our demo content with only one click to the button. This is the preferred method because it's the fastest and easiest way to get our demo content. It will import all our pages, posts, sliders etc.. If you wish to use our One Click Demo Content Importer, please see the guide below.
Demo data is only for theme testing purpose. Do not install demo data on a production website.
Step 01:
Go to menu Harnold >Theme Options Rest All Options.
Step 02 :
To import demo data go on Appearance > Import Demo Data.
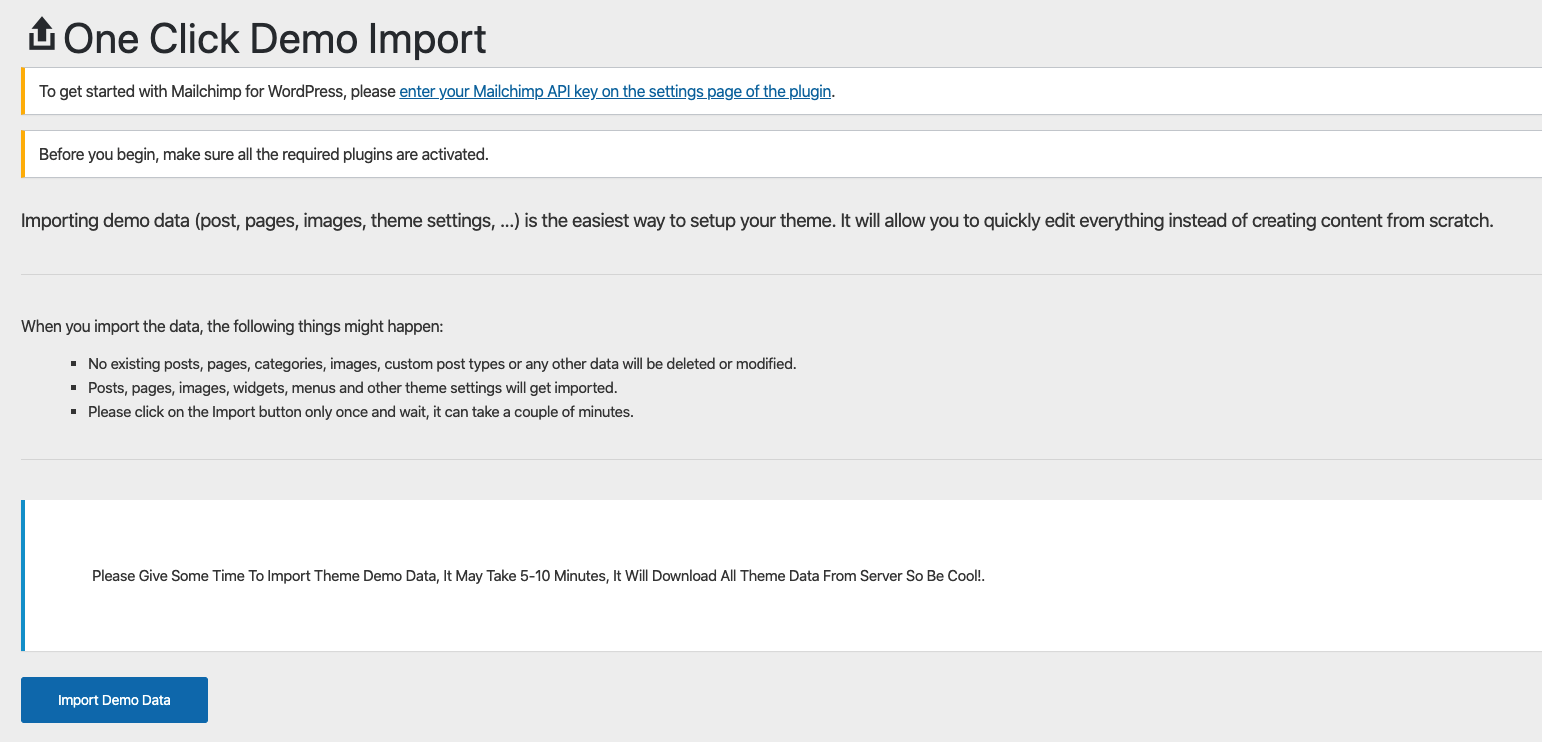
Step 03 :
Click on import demo data and please wait for import all data. It may take 3 to 5 minute depends on your sarver speed. Please be patient don't click import demo data button twice.
You can deactive one click demo import plugin after import demo data.
Customizer Options
Using customizer options, you can control every most of the colors settings of the theme. Let’s start learning customizer options. Go to Appearance > customize > Harnold Options
Main Color
01. Theme Main Color :
This is theme primary color, means it'll affect most of elements that have default color of our theme primary color
02. Theme Main Color Two :
This is theme primary color, means it'll affect most of elements that have default color of our theme primary color two
03. Theme Secondary Color :
This is theme secondary color, means it'll affect most of elements that have default color of our theme secondary color
04. Theme Heading Color :
This is theme heading color, means it'll affect all of heading tag like, h1,h2,h3,h4,h5,h6
05. Theme Paragraph Color :
This is theme paragraph color, means it'll affect all of body/paragraph tag like, p,li,a etc
Header One Options
Nav Bar Options
01. Nav Bar Background Color:
you can change nav bar background color
02. Nav Bar Text Color:
you can change nav bar text color
03. Nav Bar Hover Text Color:
you can change nav bar hover text color
Dropdown Options
01. Dropdown Background Color:
you can change dropdown background color
02. Dropdown Text Color:
you can change dropdown text color
03. Dropdown Border Color:
you can change dropdown border color
04. Dropdown Hover Text Color:
you can change dropdown hover text color
05. Dropdown Hover Background Color:
you can change dropdown hover background color
Header Two Options
Nav Bar Options
01. Nav Bar Background Color:
you can change nav bar background color
02. Nav Bar Text Color:
you can change nav bar text color
03. Nav Bar Hover Text Color:
you can change nav bar hover text color
04. Nav Bar Button Backgorund Color:
you can change nav bar button background color
05. Nav Bar Button Color:
you can change nav bar button color
06. Nav Bar Button Hover Backgorund Color:
you can change nav bar button hover background color
07. Nav Bar Button Hover Color:
you can change nav bar button hover color
Dropdown Options
01. Dropdown Background Color:
you can change dropdown background color
02. Dropdown Text Color:
you can change dropdown text color
03. Dropdown Border Color:
you can change dropdown border color
04. Dropdown Hover Text Color:
you can change dropdown hover text color
05. Dropdown Hover Background Color:
you can change dropdown hover backgorund color
Header Three Options
Top Bar Options
01. Top Bar Background Color:
you can change top bar background color
02. Top Bar Text Color:
you can change top bar text color
03. Top Bar Icon Color:
you can change top bar icon color
04. Top Bar Hover Color:
you can change top bar hover color
Nav Bar Options
01. Nav Bar Background Color:
you can change nav bar background color
02. Nav Bar Text Color:
you can change nav bar text color
03. Nav Bar Hover Text Color:
you can change nav bar hover text color
04. Nav Bar Button Backgorund Color:
you can change nav bar button background color
05. Nav Bar Button Color:
you can change nav bar button color
06. Nav Bar Button Hover Backgorund Color:
you can change nav bar button hover background color
07. Nav Bar Button Hover Color:
you can change nav bar button hover color
Dropdown Options
01. Dropdown Background Color:
you can change dropdown background color
02. Dropdown Text Color:
you can change dropdown text color
03. Dropdown Border Color:
you can change dropdown border color
04. Dropdown Hover Text Color:
you can change dropdown hover text color
05. Dropdown Hover Background Color:
you can change dropdown hover background color
Sidebar Options
01. Sidebar Widget Title Color:
you can change sidebar title color
02. Sidebar Widget Title Bottom Border Color:
you can change sidebar title color
03. Sidebar Widget Text Color:
you can change sidebar text color
Footer Options
Footer Options
01. Footer Background :
you can change background of footer
02. Footer Bottom Border Color :
you can change bottom border color of footer
Footer Widget Options
01. Footer Widget Title Color
you can change footer widget title color
02. Footer Widget Text Color:
you can change footer widget text color
Copyright Area
01. Copyright Area Border Color
you can change copyright area border color
02. Copyright Area Text Color:
you can change copyright area text color
Theme Options
General Options
Preloader Options
01. Preloader
you can set Yes / No to enable/disable preloader
02. Background Color
you can set preloader background color
Back Top Options
01. Back Top
you can set Yes / No to show/hide back to top
02. Back Top Icon
you can set icon for back to top.
Header & Footer Style
Navbar Option
01. Navbar type
you can set navbar type for all pages
Header One Options
01. Logo
you can upload logo for header one here it will overwrite customizer uploaded logo
Header Two Options
01. Logo
you can upload logo for header here it will overwrite customizer uploaded logo
02. Button
you can show/hide button of header navbar
03. Button Title
you can show/hide button title of header navbar
04. Button Link
you can show/hide button link of header navbar
Header Three Options
01. Logo
you can upload logo for header four here it will overwrite customizer uploaded logo
02. Button
you can show/hide button of header four navbar
03. Button Title
you can show/hide button title of header four navbar
04. Button Link
you can show/hide button link of header four navbar
05. Top Bar Shortcode
you can select or enter shortcode for topbar
Breadcrumb
01.Breadcrumb
you can set Yes / No to show/hide breadcrumb
02. Background Image
you can set background for breadcrumb
Footer
Footer Options
01.Footer Spacing
you can set Yes / No to set footer spacing
02. Footer Top Spacing
you can set padding for footer top
03. Footer Bottom Spacing
you can set padding for footer bottom
Footer Copyright Area Options
01. Copyright Area Spacing
you can set Yes / No to set copyright area spacing
02. Copyright Area Text
use {copy} for copyright symbol, use {year} for current year.
03. Copyright Area Top Spacing
you can set padding for copyright area top
03. Copyright Area Bottom Spacing
you can set padding for copyright area bottom
Blog Page Post Options
01. Posted By
you can set Yes / No to show / hide posted by.
02. Posted On
you can set Yes / No to show / hide posted on.
03. Posted Category
you can set Yes / No to show / hide posted category.
04. Comment Number
you can set Yes / No to show / hide comment number.
05. Read More Button
you can set Yes / No to show / hide read more button.
06. Read More Text
you can set read more button text to button text.
07. Excerpt More
you can set read more button text to button text.
08. Excerpt Length
you can set excerpt length for post.
Blog Single Post Options
01. Posted By
you can set Yes / No to show / hide posted by.
02. Posted On
you can set Yes / No to show / hide posted on.
03. Posted Category
you can set Yes / No to show / hide posted category.
04. Comment Number
you can set Yes / No to show / hide comment number.
05. Post Navigation
you can set Yes / No to show / hide post navigation.
06. Posted Tags
you can set Yes / No to show / hide post tags.
07. Post Share
you can set Yes / No to show / hide post share.
404 Page Options
01. Page Background Color
you can set background color.
02.Title
you can set title
03. Sub Title
you can set subtitle
04. Paragraph
you can set paragraph
05. Button Text
you can set button text
06. Page Spacing Top
you can set padding top
07. Page Spacing Bottom
you can set padding bottom
Blog Page Options
01. Select Page Layout
you can set page layout.
02. Page Background Color
you can set page background color
03. Page Spacing Top
you can set padding top
04. Page Spacing Bottom
you can set padding bottom
Blog Single Page Options
01. Select Page Layout
you can set page layout.
02. Page Background Color
you can set page background color
03. Page Spacing Top
you can set padding top
04. Page Spacing Bottom
you can set padding bottom
Archive Page Options
01. Select Page Layout
you can set page layout.
02. Page Background Color
you can set page background color
03. Page Spacing Top
you can set padding top
04. Page Spacing Bottom
you can set padding bottom
Search Page Options
01. Select Page Layout
you can set page layout.
02. Page Background Color
you can set page background color
03. Page Spacing Top
you can set padding top
04. Page Spacing Bottom
you can set padding bottom
Event Single Page Options
01. Select Page Layout
you can set page layout.
02. Page Background Color
you can set page background color
03. Page Spacing Top
you can set padding top
04. Page Spacing Bottom
you can set padding bottom
05. Event Navigation
you can enable/disable event navigation
Donation Archive Page Options
01. Select Page Layout
you can set page layout.
02. Page Background Color
you can set page background color
03. Page Spacing Top
you can set padding top
04. Page Spacing Bottom
you can set padding bottom
05. Donation Form Excerpt Length
you can set form excerpt length
06. Donation Form Button Text
you can set form button text
Donation Single Page Options
01. Select Page Layout
you can set page layout.
02. Page Background Color
you can set page background color
03. Page Spacing Top
you can set padding top
04. Page Spacing Bottom
you can set padding bottom
Typography Options
Body Font
01. Typography
you can set font-family, font-style, font-size, line-height for body font except(h1,h2,h3,h4,h5,h6) those if you do not use another font for heading
02. Load Font Variant
you can select which font variant to load
Heading Font
01. Typography
you can set font-family, font-style, font-size, line-height for heading font for heading (h1,h2,h3,h4,h5,h6) tags
02. Load Font Variant
you can select which font variant to load
Page Settings
Layout & Colors Options
01. Page Layout :
Your can set page layout
02. Page Content Background Color:
you can set page content background color here
03. Page Background Color:
you can set page background color here
Page Header & Breadcrumb Options
01. Navbar Type:
you can set navbar type.
02. Page Title:
you can set Yes / No to show/hide page title.
03. Page Breadcrumb:
you can set Yes / No to show/hide page breadcrumb.
Page Width & Padding Options
01. Page Full Width:
you can set Yes / No to set page container full width..
02. Page Spacing Top:
you can set Padding Top for page container.
03. Page Spacing Bottom:
you can set Padding Bottom for page container..
04. Page Content Spacing :
you can set Yes / No to set page content spacing..
Custom Widgets
About Us
01. Logo:
you can upload logo for about us widget.
02. Descriptoin:
you can enter description for aobut us widget.
02. Descriptoin:
you can enter description for aobut us widget.
03. Facebook URL:
Leave it blank if you don't want this social icon
04. Twitter URL:
Leave it blank if you don't want this social icon
05. Linkedin URL:
Leave it blank if you don't want this social icon
06. Instagram URL:
Leave it blank if you don't want this social icon
07. Google-plus URL:
Leave it blank if you don't want this social icon
08. Youtube URL:
Leave it blank if you don't want this social icon
Recent Post With Thumbnail
01. Title:
you can set title.
02. No Of Posts:
you can no of posts.
03. Order:
you can set order.
04. Order By:
you can set orderby.
Contact Us
01. Title:
you can set title.
02. Location Info:
Leave it blank if you don't want to show this info.
03. Phone Info:
Leave it blank if you don't want to show this info
04. Email Info:
Leave it blank if you don't want to show this info.
Donation Post With Thumbnail Widget
01. Title:
you can set title.
02. No Of Posts:
you can no of posts.
03. Order:
you can set order.
04. Order By:
you can set orderby.
Donate By Phone Widget
01. Title:
you can set title.
02. Subtitle:
you can set subtitle.
03. Background Image:
you can set background image.
How to use Elementor
Eelementor Page Builde Video Tutorial
if you are new in using elementor page builder here is video tutorial for you
How to use The Event Calendar
The Event Calendar Video Tutorial
if you are new in using The Event Calendar here is video tutorial for you
How to use GiveWp
GiveWp Video Tutorial
if you are new in using GiveWp here is video tutorial for you
How to use WooCommerce
WooCommerce Video Tutorial
if you are new in using WooCommerce here is video tutorial for you
How to use Contact Form 7
Getting Started with Contact Form 7
This guide is an introduction to the Contact Form 7 plugin for WordPress. Basic knowledge of WordPress administration is required. With various examples, this tutorial explains how to display a form on your page, and how to customize your forms and mail.
See easy step by step documentationIf you do not import our demo data then use this code for contact form
Contact page form
                    <div class="contact-page-form style-01">
                        <div class="row">
                            <div class="col-md-12">
                                <div class="form-group">
                                    [text* your-name class:form-control placeholder "Your Name"]
                                </div>
                            </div>
                            <div class="col-md-12">
                                <div class="form-group">
                                    [email* your-email class:form-control placeholder "Your Email"]
                                </div>
                            </div>
                            <div class="col-md-12">
                                <div class="form-group">
                                    [text* your-subject class:form-control placeholder "Your Subject"]
                                </div>
                            </div>
                            <div class="col-md-12">
                                <div class="form-group">
                                    [textarea* your-message class:form-control placeholder "Message"]
                                </div>
                            </div>
                            <div class="col-md-12">
                                <div class="btn-wrapper">
                                    [submit class:boxed-btn "Send Message"]
                                </div>
                            </div>
                        </div>
                </div>
home page four
                    <div class="contact-page-form home-04">
                        <div class="row">
                            <div class="col-lg-5">
                                <div class="form-group">
                                    [text* your-name class:form-control placeholder "Your Name"]
                                </div>
                            </div>
                            <div class="col-lg-5">
                                <div class="form-group">
                                    [email* your-email class:form-control placeholder "Your Email"]
                                </div>
                            </div>
                            <div class="col-lg-2">
                                <div class="btn-wrapper">
                                    [submit class:boxed-btn class:brrtb "Join With Us"]
                                </div>
                            </div>
                        </div>
                    </div>
Join As Volunteer
                    <div class="request-page-form">
                        <div class="row">
                            <div class="col-md-12">
                                <div class="form-group">
                                    [email* your-email class:form-control placeholder "Your Email"]
                                </div>
                            </div>
                            <div class="col-md-12">
                                <div class="form-group">
                                    [text* your-name class:form-control placeholder "Your Name"]
                                </div>
                            </div>
                            <div class="col-md-12">
                                <div class="form-group">
                                    [text* your-city class:form-control placeholder "Your City"]
                                </div>
                            </div>
                            <div class="col-md-12">
                                <div class="form-group">
                                    [tel* your-phone class:form-control placeholder "Your Phone"]
                                </div>
                            </div>
                            <div class="col-md-12">
                                <div class="form-group">
                                    [textarea* your-textarea class:form-control placeholder "Message"]
                                </div>
                            </div>
                            <div class="col-md-12">
                                <div class="form-group">
                                    [submit class:submit-btn "Submit Request"]
                                </div>
                            </div>
                        </div>
                    </div>
Join As Volunteer two
                    <div class="contact-page-form">
                        <div class="row no-gutters">
                            <div class="col-lg-3">
                                <div class="form-group">
                                    [text* your-name class:form-control class:brrtb placeholder "Your Name"]
                                </div>
                            </div>
                            <div class="col-lg-3">
                                <div class="form-group">
                                    [email* your-email class:form-control class:brnone placeholder "Your Email"]
                                </div>
                            </div>
                            <div class="col-lg-3">
                                <div class="form-group">
                                    [tel* your-phone class:form-control class:brnone placeholder "Your Phone"]
                                </div>
                            </div>
                            <div class="col-lg-3">
                                <div class="btn-wrapper">
                                    [submit class:boxed-btn class:brrtb "Join With Us"]
                                </div>
                            </div>
                        </div>
                    </div>
Newsletter
                    <div class="contact-page-form">
                        <div class="row no-gutters">
                            <div class="col-md-6">
                                <div class="form-group">
                                    [email* your-email class:form-control class:brrtb placeholder "Email"]
                                </div>
                            </div>
                            <div class="col-md-6">
                                <div class="form-group contact-info-btn">
                                    [text* your-phone class:form-control class:brltb placeholder "Your phone"]
                                    <button type="submit" class="subscribe-btn"><i class="fas fa-long-arrow-alt-right"></i></button>
                                </div>
                            </div>
                        </div>
                    </div>
How to use MailChimp With WordPress
How To Integrate MailChimp With WordPress in Minutes
if you are new in using MailChimp With WordPress here is video tutorial for you
Supports
Thank you for reading the documentaion. If you still have any question or any problem, please contact with us. We will give you best support. Thanks.
ir-tech